
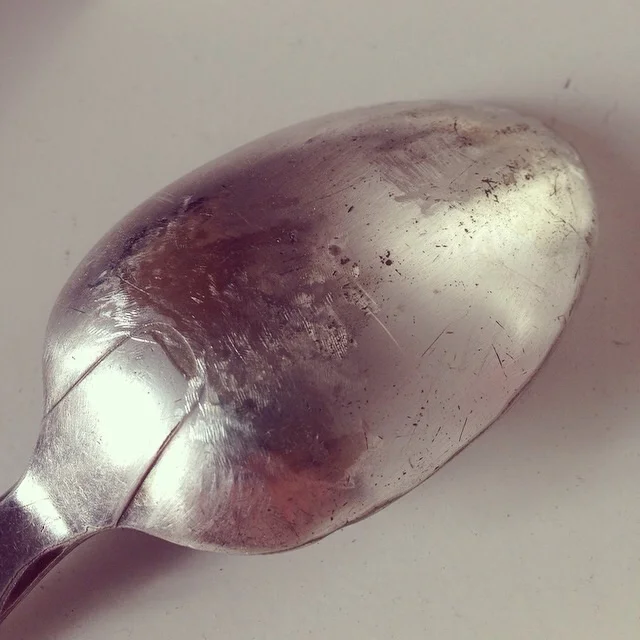
Whilst baking some cakes this week for the Pot Luck party (a party where you bring a random dish) I measured out a table spoon of sugar into a bowl, using the same spoon I have always used for doing any kind of baking. However, this time was different, with my new found interest in silver I spotted it had some hallmarkings on the back. I knew it wasn't any kind of silver as I didn't recognise any of the markings and from the way layers were revealing underneath I knew it definitely couldn't be solid 925 sterling silver. Curious I headed to google to find out more.
Heres the spoon:


Here's the hallmarks:

The markings were 'B' 'JD' '&' 'S' 'EP' followed by some kind of symbol.
I found out the JD & S were the initials of a company dating back to 1866 founded by James Deakin later to be James Deakin and sons (not to be confused with James Dixon and sons also known as JD & S). To prevent confusion the desk bell was added to the hallmark with James Dixon using a bugle symbol.
This is an extract taken from the silver collection website:
The firm was founded in Sheffield by James Deakin in 1866.
The first mark was entered by the firm in Sheffield Assay Office on 31 January 1878. It was a "JD" over "WD" and, possibly, represented the partnership of James Deakin and his son William Pitchford Deakin. The firm was active at Sidney Works, Matilda Street, Sheffield.
In 1886 two further sons entered in the partnership, John Deakin and Albert Deakin, and the firm was then known as James Deakin & Sons.
Further marks were entered in London Assay Office (1888) by William and John Deakin (subsidiary offices and showrooms at 48 Holborn Viaduct, London), Chester and Birmingham. Further offices and showrooms were opened at Gardiner House, 14 Charterhouse Street, London, 34 St. Enoch Square, Glasgow and 7 Queen Street, Belfast.
After the retirement of James Deakin (1893) the business was continued by his sons William, John and Albert.
In 1897 the firm was converted into a limited liability company under the style James Deakin & Sons Ltd.
The firm was the proprietor of Shaw and Fisher, Electro-plate Manufacturers (established 1835) and of Walter Latham & Son, Sterling Silver & Electro-plate manufacturers (established 1874).
To avoid any confusion with the production of another Sheffield manufacturer having the same initials JD&S (James Dixon & Sons) the firm used in its silverplate production a figural trade mark representing a 'desk bell' (often interpreted as a 'lamp'). Likewise, Dixon used a figural trade mark (registered in 1879) representing a 'bugle'.
Trade marks used: AZTEC, PURITAN, REVLIS, SARBON, SHAW & FISHER, SIDNEY SILVER. The firm closed its activity circa 1940
The company was an electroplating silver manufacterer which is why I didnt recogise the hallmarks as I only know solid 925 sterling silver hallmarks. Through further googling I found out the 'B' is the grade of the piece (A1 grade being top quality) and the 'EP' stands for electro-plating - the process used to apply the silver plating.
Since the company became '& sons' in 1874 and ceceased trading in 1940 the spoon must have been made between these dates. Unfortunately I don't think silver plating requires any date stamp so I might not ever know how old the spoon is.
We've had the spoon in our family for over thirty years. It was originally picked up from a jumble sale for 10p by my mum when she was in her 20's for her new house. We didn't quite realise it was going to be at least 80 years old. With my super polishing skills I felt it would be fitting to try and restore it to its former glory. You can see from the original picture above, there was quite a lot of work to do. Here the restoration process begins...

Lots of really deep scratches to work out.
Using a file I attempted to strip back some of the layers to even out the surface. This proved quite cumbersome so I resorted to the Dremel and used the sanding attachment.

Due to the curve of the sanding piece I was able to re-create the smooth curve of the spoon.
The inside of the spoon was a little trickier because of the curvature, so I could only use the top edge of the dremel sanding attachment, which took quite a while.

Once the majority of the deep scratches were removed I used the various grades of wet and dry sandpaper. Starting with 600 and finishing with 1200. Then finally going over the whole spoon with an abrasive block to even everything out ready for polishing.
Next I intend to complete a full polish with tripoli and rouge so I can send it to be re-plated. It looks great so far (if a little thinner than before) but it will look even better once it has been polished and re-plated. Watch this space...
Oh and these were the cakes I baked. Ice cream cone cupcakes! They tasted amazing. (Recipe via madbaking.com)

Note: I finally completed the spoon with its sliver plating. I had 10 microns of plating added so that it can continue its life as a spoon (it's everyone's favourite spoon for cooking so it seemed the right thing to do). For a piece of jewellery you would have 5 microns which is essentially the thickness of the plating, this has double to survive the everyday use. Here's how it looks now:

Back of the spoon looking all new again

Hallmark showing the markers mark and where it was made

Front of the finished spoon